

Monitor and Parse Your Linux Syslogs with ELM
While we tend to primarily focus on the protection of our Windows Servers and Workstations for critical day to day operations, quite often there is a group of Linux based machines or images in-house that can sometimes be overlooked, yet are just as vital to keeping things “business as usual.” In this article we’ll cover setting up a Linux distribution to push Syslogs to an ELM server and show how ELM maps the data to a standardized windows event format, allowing you to parse fields for specific keywords and phrases for filtering, notifications and reports.
The Network license in ELM Enterprise Manager provides features to support both Syslog and SNMP traffic as well and PING and Port Monitoring. First introduced in ELM version 6.5, this license was most commonly used with firewalls, however it works perfectly to bring the Linux OS into your monitoring visibility.
On the Linux Side
We’ll start by configuring our Linux instance to send messages to the ELM Server. In this case we are working with an Ubuntu 18.x installation so your file paths and commands may vary slightly with different distributions of Linux.
The first step is to modify the rsyslog config and instruct it to send to the ELM Server. The file is found at this location root:/etc/rsyslog.d/50-default.conf. Depending on the account you are using, you will most likely have to change permissions before you can make any config file changes.
The internet is full of examples on how to change file permissions in Linux.
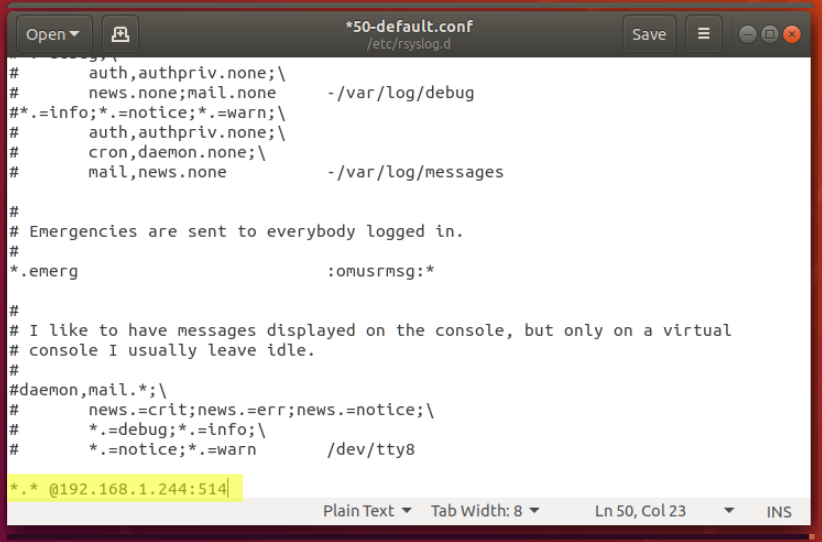
Now open the “50-default.conf” file in a text editor and add these line to the bottom:
*.* @Host Name or IP Address of ELM Server:514
Example: *.* @192.168.1.244:514
TCP on 514 is the port most commonly used for Syslog.
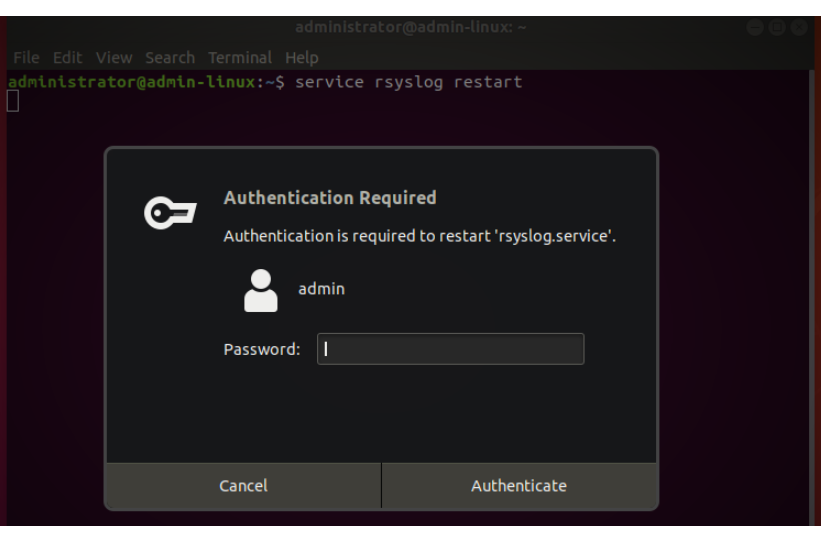
Save the config file. Now restart the Syslog daemon on Linux in the terminal window:
service rsyslog restart
(This will normally require password authentication to complete)
On the ELM Side
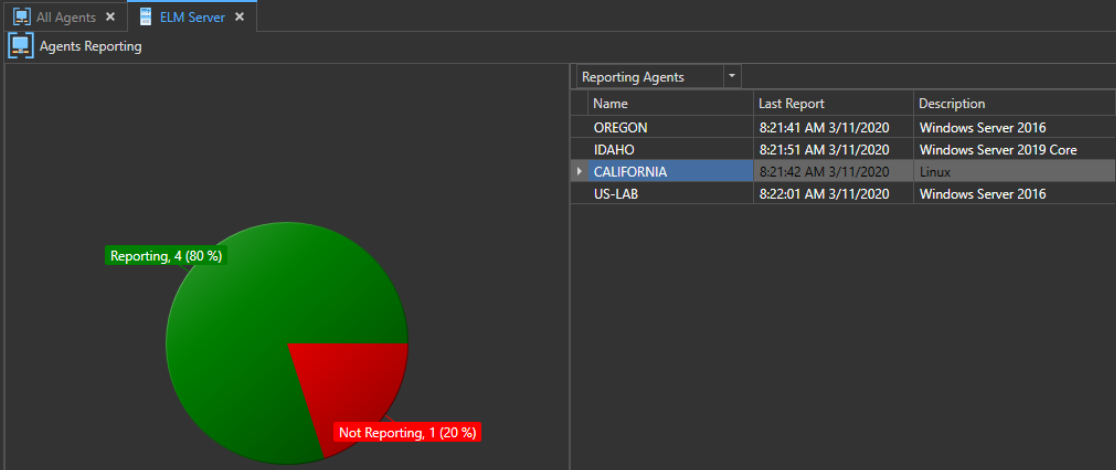
ELM Enterprise Manager has built-in logic that allows it to automatically assign a new Network license (if available) or a Log or System license when available, to any device that sends Syslog or SNMP data. As we can see here, the ELM Server has picked up our “California” machine and assigned it a Network Class II license (for a desktop OS).
If we expand Event Views and Open the Syslog and SNMP view we can see all of the Syslogs and SNMP data the ELM Server is collecting displayed there. This view can be filtered, sorted, and customized just like any Windows Event View.
Mapping Data Fields
The Syslog Receiver monitoring item in ELM can be customized using regex (regular expression) to look for certain sequences of characters and populate event fields. This happens before the data is inserted into the database.
To do this, we will start in the MMC Console. Navigate to Monitoring and Management > Agents and Monitors Library > All Monitors.
Now we can either create a new Syslog Receiver using the wizard, or we can make a copy of the existing Syslog Receiver and modify it. This is an important step because configuration changes further down into this article will overwrite an existing Syslog Receiver’s configuration if only one is present. If you’re not worried about that then you can skip copying or creating a new one and just modify the default.
From the list we’ll find the appropriate Syslog Receiver we are going to modify, right-click and select Export to > File.

Select a location that is easily accessible and save the XML file. You may want to choose a different name such as “Syslog Receiver – All Events – Custom.xml”.
Within the XML there are several modifiers which can be updated using regex, allowing Syslog message information to populate different event fields:
TimeModifier=””
ComputerModifier=””
LogModifier=””
CustomCategory=””
EventIdModifier=””
MessageModifier=””
UserModifier=””
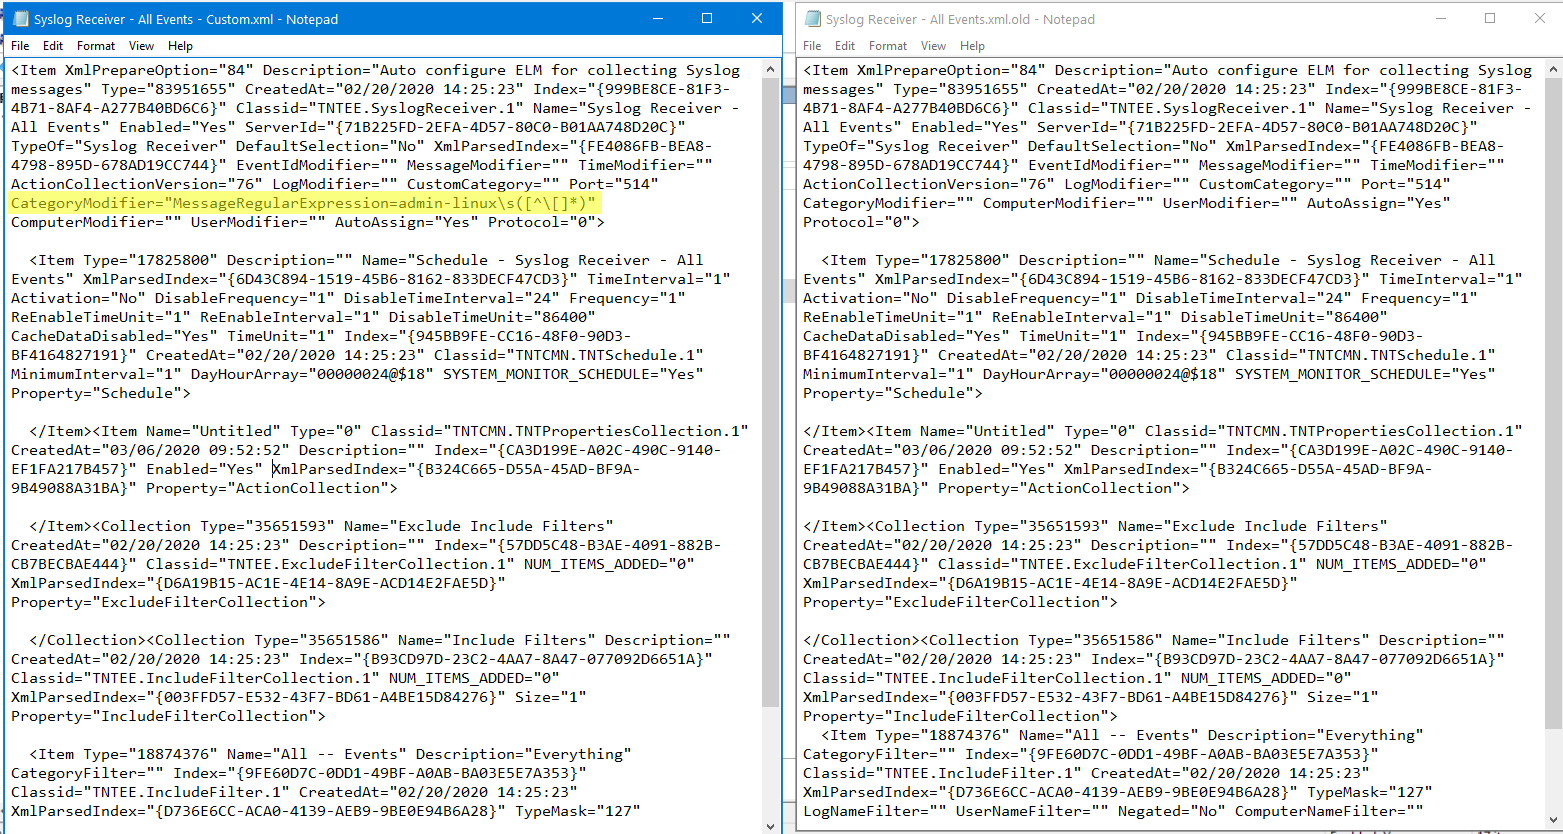
CategoryModifier=”MessageRegularExpression=name=”([^”]*:)”
In this example when the keyword “name” is found followed by an = sign then the word following, that is contained in quotes is extracted and inserted into the Category name event message field.
Here is an example of customized XML on the left (compared to the default on the right) ready to be imported back in, instructing the Syslog Receiver to parse the message text following “admin-linux” into the Category field:
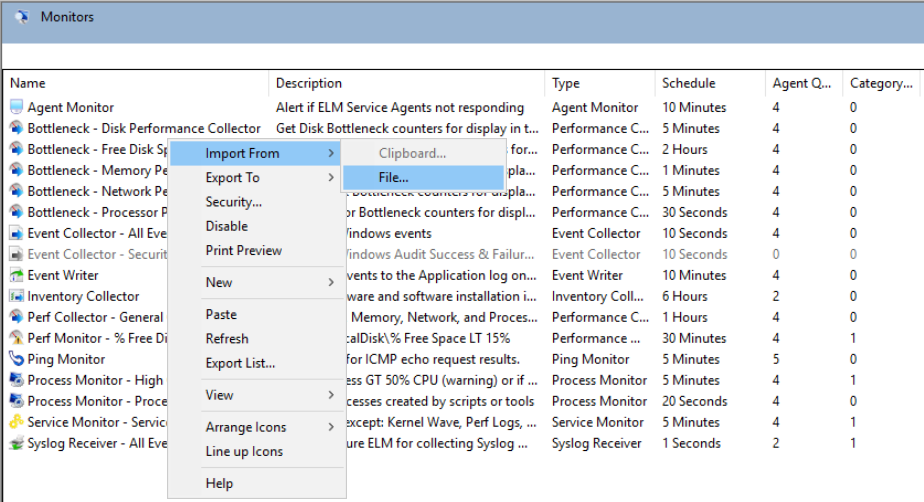
To import the updated XML, we’ll follow a similar procedure as the Export method but this time we’ll right-click in the white space of All Monitors and choose Import > File. Then navigate to our updated Syslog Receiver XML file and load it.
This will replace the configuration of the Syslog Receiver it was exported from. If there are other Syslog Receivers setup it will not change their configuration.
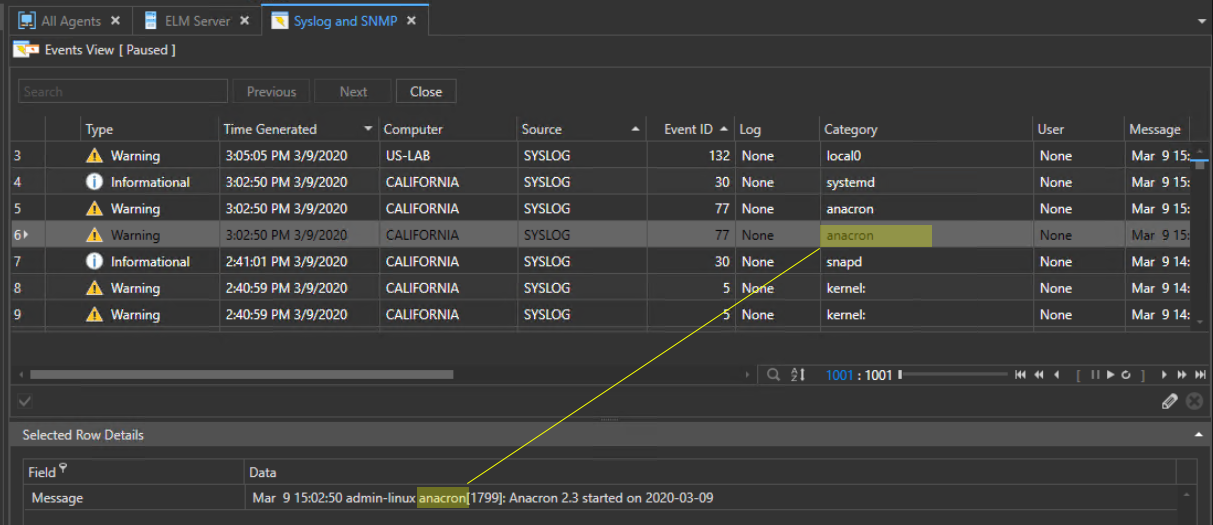
And here is what that Syslog message text looks like parsed into an Event View:
We’ve shown just one simple example of using regex with the Syslog Receiver to parse out specific text to an event field. You could have several different Syslog Receivers uniquely configured using this technique and assigned to different monitoring categories (groups of agents) or individual agents to get the exact results you want.
This is an incredibly powerful tool allowing you to customize monitoring over different Linux distributions and functions as well as firewalls and other network devices.
Regex Look Intimidating?
If you don’t feel comfortable working in Regex to modify the XML of the Syslog Receiver, give our support team a call. We’d be happy to work with you on getting ELM setup to monitor Syslogs for your specific needs.
User Guides for More Help
For more details on the Syslog Receiver, please refer to this User Guide section: https://firemtsoftware.com/help/web_eem_75/mmc_syslog_receiver.html