

About This Article
While the Windows Event Viewer (eventvwr.msc) may provide the ability to export logs just from a local machine, ELM Enterprise Manager provides the ability to view and manage logs from multiple machines across your network. This article describes how to take one of the many customizable views in ELM and bring it into Microsoft Excel for further customization.

Updated May 25, 2022
ELM provides very powerful ways to manipulate the event data on your screen through customizable filters in views, reports and more, but sometimes that just isn’t enough. This tech tip article will walk you through a few quick and easy steps to export the contents of an event view out to a file and quickly into Microsoft Excel for further formatting and customization.
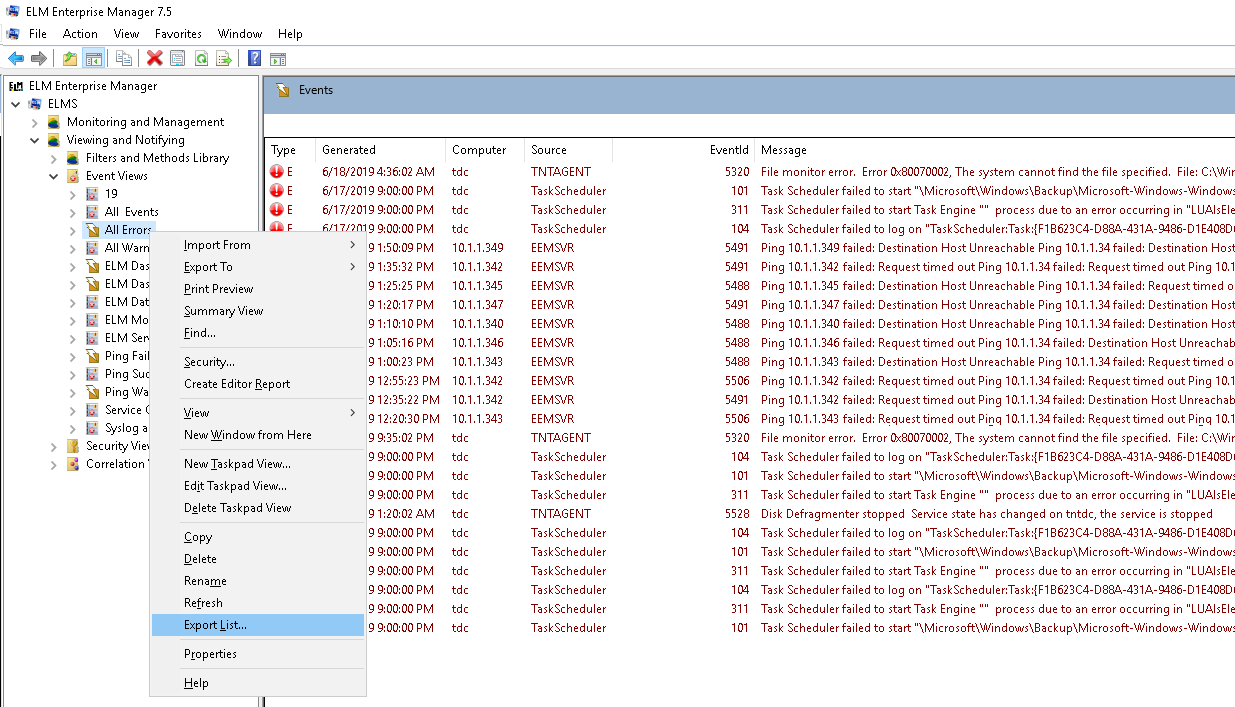
We start with the (MMC) ELM console open and pick a View to export. In this example we’re going to take a look at the All Errors View. The first step in this process is to click on the View itself so that the right pane of the console is populated with the events specific to that View. If you skip this and try to perform the function from another View in the list without first populating the right pane it will not work.
With the View selected we’ll simply right click and choose “Export List” near the bottom of the menu. Note there is an option to “Export To” at the top of the menu which gives the options of Clipboard or File, neither of which is the operation we want for this exercise.
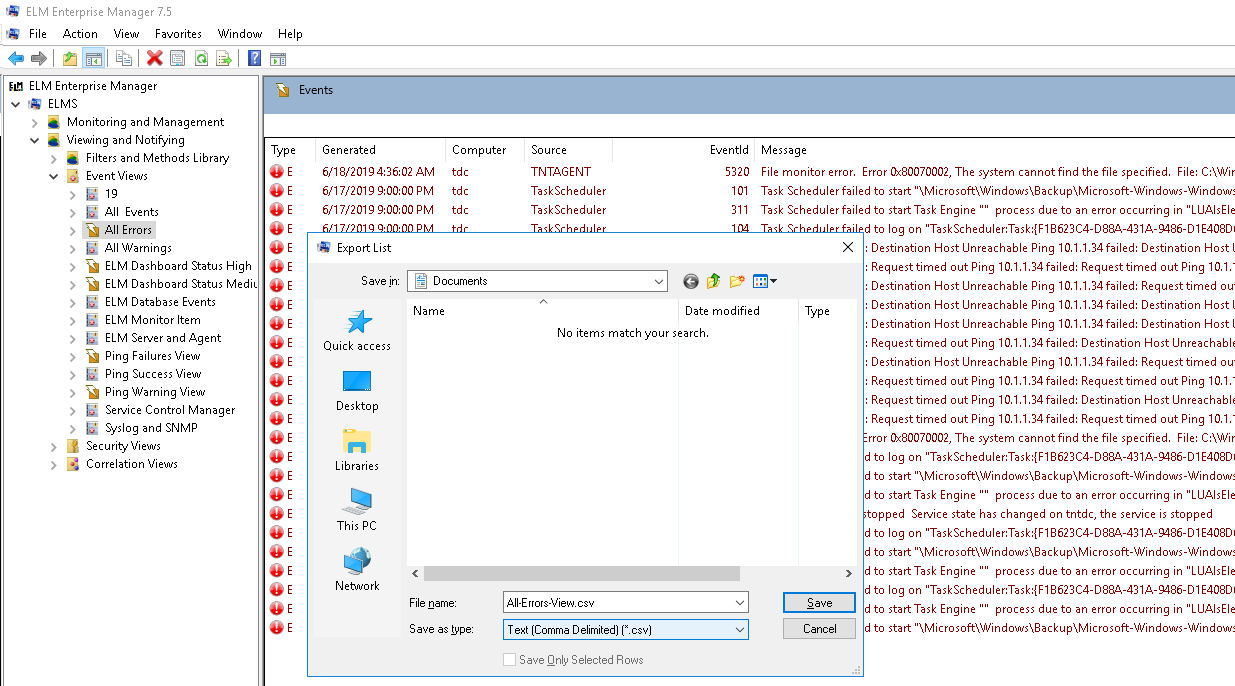
After we choose “Export List” a dialog will prompt asking where we want to save the file and what type of file we want to save as. Choose a suitable location that you can access from your installation of Microsoft Excel. Next we’re going to name the file the same as the view “All-Errors-View” and choose a Text (Comma Delimited) CSV file type. Click Save when done.
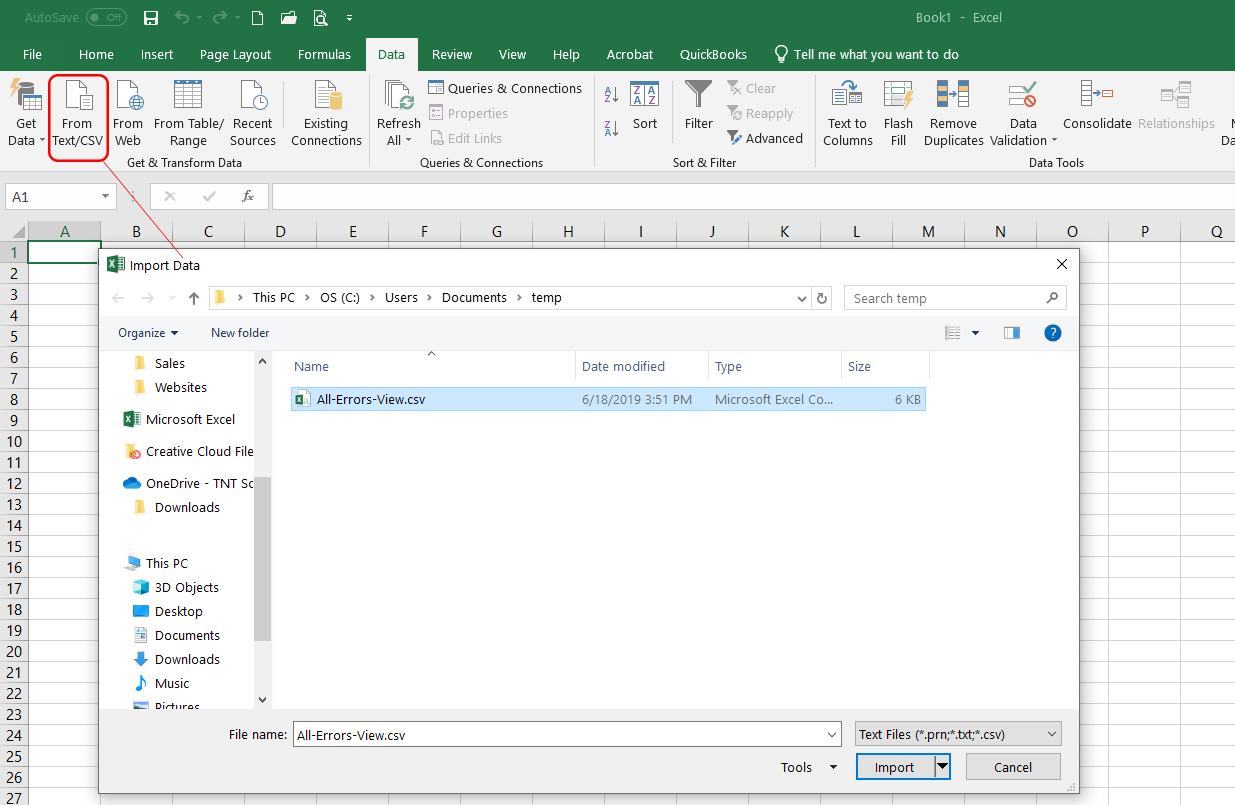
Now we’ll swing over to the local desktop, launch Microsoft Excel and then select the Data tab. From here we’ll start the import by clicking on the “From Text/CSV” button on the ribbon and another dialog will prompt us for the file we want to import. Here you can see the All-Errors-View.csv file we just created from ELM and saved to the local drive.
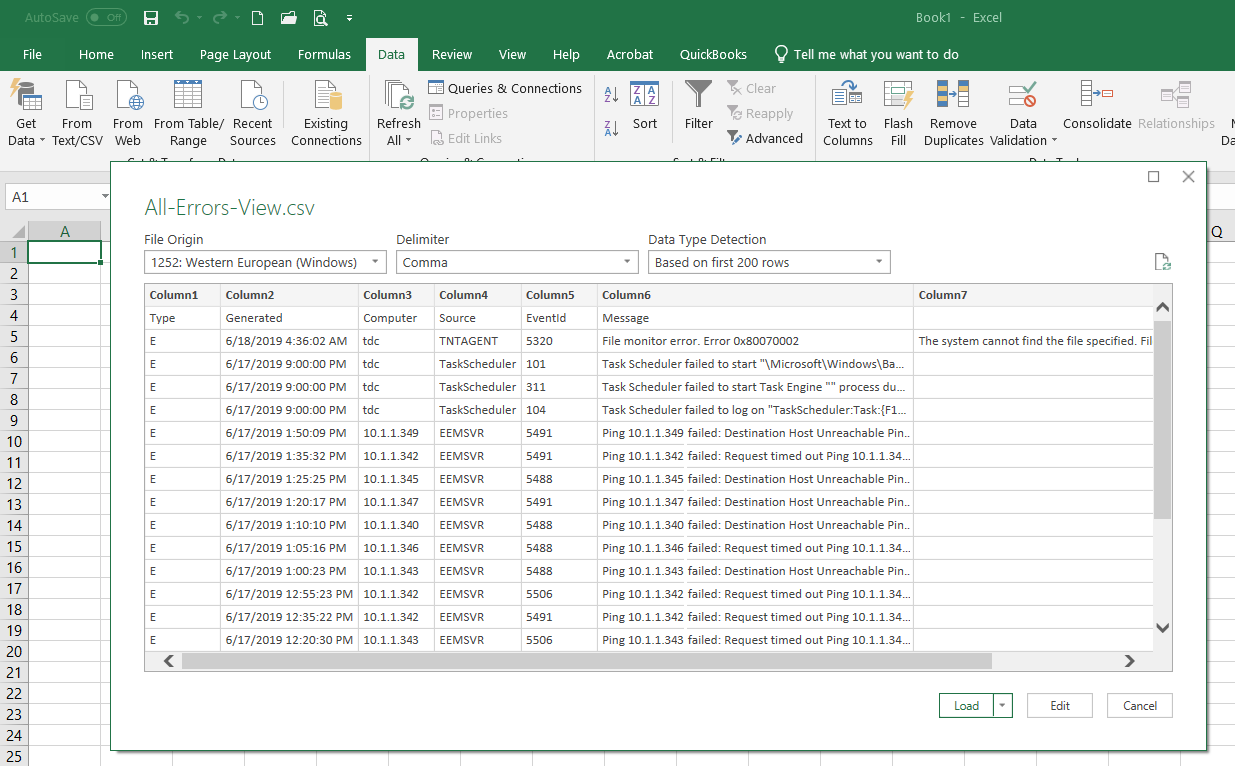
The Excel import wizard will then walk through the steps of properly formatting the imported text file, comma delimited in this case, and we will finish it up by verifying where we want the imported event data to be placed in a spreadsheet.
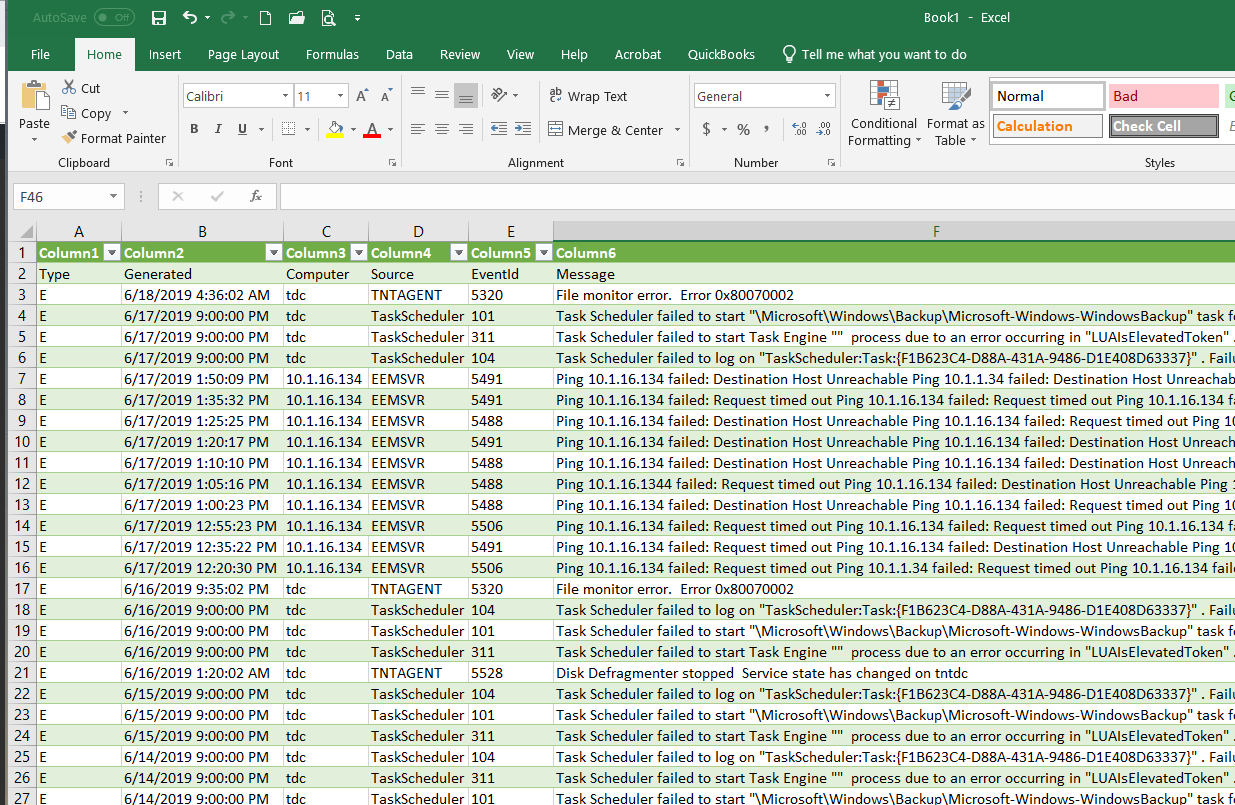
That’s it. The event data has been dropped into a spreadsheet and can now be formatted, organized, and customized as needed per our requirements!
In just a few short steps you go from ELM Event View to Excel Spreadsheet customization!
We hope that you found this article on How to Export Event Views to Microsoft Excel useful and wish you continued success with ELM Enterprise Manager.